Tag:

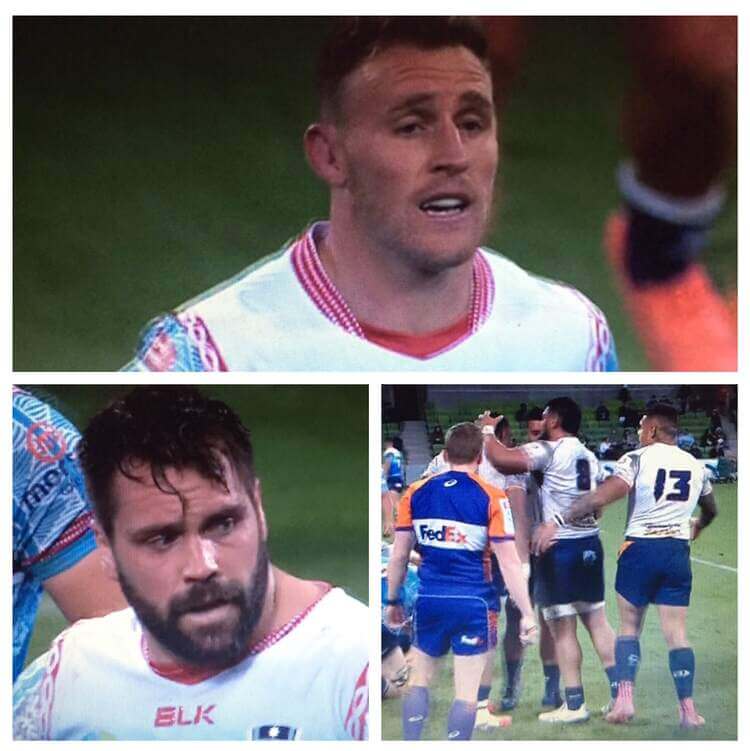
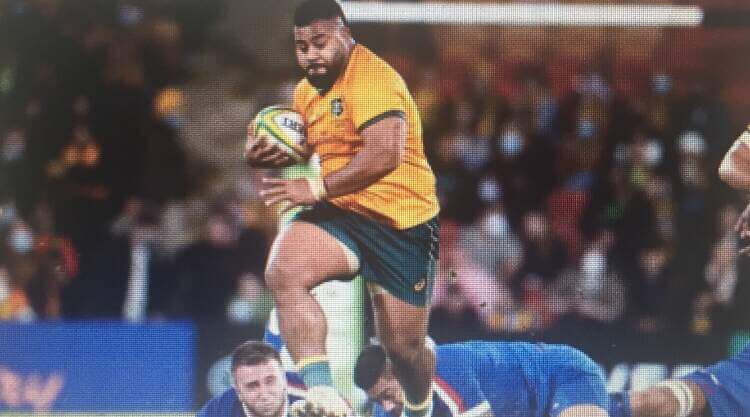
Reece Hodge

• Match ​ ​ : Australia vs France
• Series ​​ : Autumn International
• Venue​​ : Stade de France
• Time ​​ : Sunday, 6th Nov. 2022

The Wallabies led late after impressive tries from Lalakai Foketi and Jock Campbell, but Damian Penaud’s brilliance seized the win for the French at the death.
Points Summary

FranceAustralia
TriesTries
Penaud 75′Campbell 40′
Marchand 40′Foketi 17′
ConversionsConversions
Ramos 40′Foley 18′, 57′
Penalty GoalsPenalty Goals
Ramos 6′, 9′, 32′, 37′, 45′, 72′Foley 3′, 12′, 42′, 65′
Hodge 74′

• In a game that featured 33 points from penalty goals, the first of four tries saw Tom Wright fly down the left flank before putting Lalakai Foketi through to score as Australia raced into a 10-3 lead with a 100-metre effort. France rallied, though, and Thomas Ramos kicked two more penalties before Julien Marchand crashed over on the stroke of half-time.

• More penalties followed early in the second stanza before Jock Campbell found his way over in the corner to give the Aussies a 23-22 lead as Bernard Foley nailed the conversion. Ramos, Foley and Reece Hodge kicked further three-pointers and Australia led 29-25 with five to go when France threw the ball wide to the right.

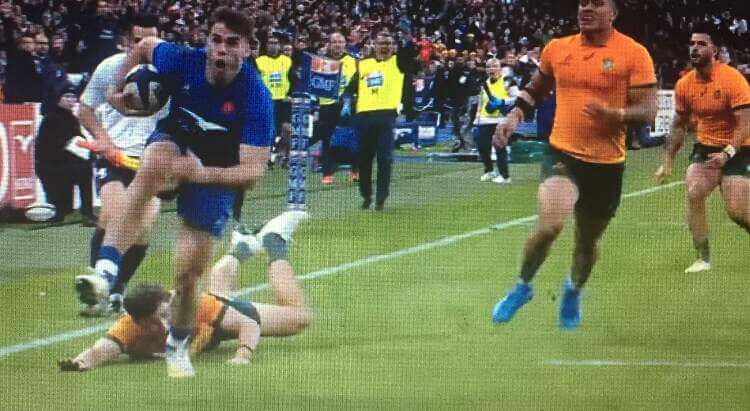
• Penaud had played out a relatively quiet game, making half-breaks here and there aside from solid defence on the wing. But when he caught Matthieu Jalibert’s pass, he defied gravity, logic and the Wallabies’ cover defence to beat three before gliding over in the corner. Ramos couldn’t convert but France still had the lead, and they held it for three more tense minutes as the clock hit 80 to seal a one-point victory for Les Bleus.

Match Preview

  • The Australian team showed a good aggressive style of play in the first half. Then after the France team started scoring points, it was tight contest between the two sides.
  • At the end of the first half, the France team was leading by 16:19. After a tight contest in the second half Damian Penaud’s last minute goal won the match for France.

Wallabies will come back stronger

  • Any rustiness seen last week against Scotland was truly ironed out in this game as the Wallabies threw the ball around seamlessly and created many an opportunity to score with ball in hand.
  • Foketi’s opening try will go head-to-head with Penaud’s winner in the ‘try of the autumn’ stakes, and the more Australia play like that, the more likely they’ll be to finish on the right side of future contests.

France set standard ahead of South Africa visit

  • The tough tests don’t let up for France, with their match next weekend coming against the current Rugby World Cup holders, South Africa.
  • The Springboks are a tough test of physicality and skill for any side but if France want to be seen as true contenders to win their home World Cup in 2023, they’ll need to push the Boks as closely as they were pushed by the Wallabies here.
0 comment
0 FacebookTwitterPinterestEmail

By Daniel Cullinane

Twitter: @dcullinane02

It was a feisty build-up to this second test between New Zealand and Australia at Eden Park. All the talk had been about the controversial decision for time-wasting that ended the Wallabies chances of winning the Bledisloe cup in the first test. The reckless action of lock Darcy Swain, and the claims that the Wallabies had disrespected the haka. The potential for a heated contest was high.

Australia got the game under way and quickly put pressure on New Zealand with a break by Jed Holloway, who charged into the All Blacks 22. He quickly undid his good work by dumping Dalton Papali’i at the ruck. He was yellow-carded, and so began the rollercoaster of indiscipline that appears to be blighting the Australian game.

New Zealand on the other hand, were lifting their game and showing early dominance. A strong scrum saw All Black number 8 Ardie Savea break. The ball went wide to Beauden Barrett, who turned on the after burners and then chipped, to pile the pressure on the Wallabies. The All Blacks were awarded a 5 metre scrum but Savea was unable to control the ball at the base. Australia cleared their lines.

Then a moment of magic from Wallaby wing, Marika Koroibete. A break down the midfield followed by a chip, catch, and grubber to put huge pressure on the New Zealanders in their own 22. Again, the Wallabies infringed, leading to a kickable penalty for Richie Mo’unga. 3-0 to the All Blacks. Wing; Will Jordan soon built on the score with a fine break and subsequent try. Mo’unga made it 10-0.

Australia was creaking badly and the pressure was clearly affecting their thinking. Tom Wright confirmed this by taking a quick tap penalty from an eminently kickable position and an almost guaranteed 3 points. Another penalty by Wallaby skipper James Slipper led to a New Zealand lineout in the Aussie 22. Afterwards, a powerful maul forced a penalty try and yet another yellow card for Australia. David Porecki left the field for 10 minutes. Half time arrived and the score was 17-0; New Zealand were flying.

In the second half, the All Blacks carried on where they had left off. Within 2 minutes, they scored through captain Sam Whitelock. Mo’unga converted to make the score 24-0. The All Blacks had by now recognised that the Wallabies couldn’t live with them in the set piece. Again, they went to the lineout. Again they formed a driving maul and powered over the Aussie line. This time it was Codie Taylor on the scoresheet. The conversion was missed. 32-0 to the All Blacks.

At last the Australians fired a shot when Nick Frost charged down a New Zealand kick in their 22. Pete Samu collected the ball and surged forwards. Support came from replacement hooker Folau Fainga’a, who charged over the line. Bernard Foley kicked the conversion; Points on the boards. 32-7.

The All Blacks responded almost immediately with another pushover try from the lineout. Samisoni Taukei’aho the scorer.

In the 76th minute, Richie Mo’unga had another shot at goal to make it 40-7. The Aussies would have the final word in a very one-sided game when a determined Jordan Petaia forced his way over. The try was converted. The final score 40-14 to New Zealand. It was a dominant display from the men in black. Probably their best performance in the tournament.

The All Blacks were sharp, their set piece was outstanding, and they were clinical when they needed to be. Australia has some big issues to deal with. Their discipline has been woeful since their test series defeat to England back in July. They have spent large parts of the Rugby Championship playing with less than fifteen men on the field. Going forward, the lack of leadership is clearly a problem they must address if they are to be successful.

0 comment
0 FacebookTwitterPinterestEmail

By Daniel Cullinane

Twitter: @dcullinane02

After an impressive performance against the South Africans in the first test, the Australians will have been confident going into the second match. The final score didn’t reflect the dominance of the Wallabies. The Springboks are all about getting the ‘W’. Their brand of rugby isn’t pretty, but it is physical and highly effective. Last week’s result will have hurt.

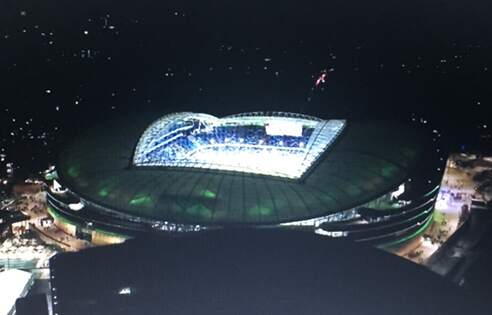
The game kicked off in a rainy Sydney at the Allianz Stadium. Right from the start, the Wallabies were looking to take the pace from the first test into this game. The South Africans looked sharp and were bringing their expected physicality. The Australians were struggling to handle the Bok’s powerful drives into their defensive line. This culminated in Damian De Allende crashing over the Aussie line in the eighth minute. The try was converted making it 0-7 to the Boks.

To add to the Wallabies’ pain, Matt Philip went to the bin for infringing in the build-up to the try. After a quiet game in Adelaide last week, South African captain Siya Kolisi, was putting in a much-improved performance. His steal at the breakdown stopped the Wallabies deep in the Boks half. Nic White was doing his best to get the ball away from the ruck with speed and was getting plenty of attention from the Boks and their fans. Possibly for his Oscar-winning performance in the previous test.

The Boks continued to go through their bullying tactics upfront but were creating little in the backs. They continually tested Reece Hodge in the first half under the high ball, but he dealt with everything that came his way. The Australians were building nicely in the Boks half and putting pressure on the South African’s defence. This eventually led to a penalty and three easy points for Wallaby fly half, Noah Lolesio.

As halftime approached the Australians would have been pleased with the 3-7 scoreline. The Boks had produced little in the way of creativity and were still there for the taking. Then, from a South African box kick, a moment of brilliance from their debut wing, Canan Moodie. He leapt high above Aussie wing Marika Koroibete, and raced away with the ball to score his first try for the Springboks. The half ended 3-12 to the South Africans.

After the break, both teams appeared nervy, and a kicking battle ensued. Two minutes into the half, and the Boks were starting to string together some passes leading to a try for lock Franco Mostert. A missed conversion by Boks fly-half Damian Williamse made the score 3-17.

The South Africans were taking control of the game. The Australians were desperate to get hold of the ball and keep it. Nic White made a timely intervention to intercept a pass to Mpimpi on the wing. Australia went on the attack and made their way up the field. They put the Boks under huge pressure forcing them to persistently infringe, however no cards were shown to any of the South African team. The Australians kicked to touch, but then let the Boks off by committing a penalty and allowing them to clear their lines.

It was clear to see that the Wallabies were starting to lose their shape and the Springboks were in full control. Wave after wave of Springbok attack lead to Damian De Allende being driven over the Australian line, but he was held up. Shortly after, a sweeping move by the South Africans saw Makazole Mapimpi score in the corner.

His celebration was not welcomed by Koroibete and sparked a huge brawl. Mapimpi was yellow carded, but expect more sanctions when the citing officer has reviewed the incident. A final flourish from the Wallabies saw Pete Samu score leaving the end result, 8-24. The Springboks were deserved winners of a niggly contest, and Siya Kolisi was immense.

0 comment
0 FacebookTwitterPinterestEmail

Round 11 of the 2022 Super Rugby Pacific continues to breed spectacular match-ups like this Saturday night fixture between the Melbourne Rebels v Moana Pasifika at AAMI Park. It was a competitive first-half spell when the Rebels caught up to Moana, 14-10, at the break. Although, Moana struck one back where they briefly regained the lead. However, it’s the Rebels who were unstoppable before they shut Moana down by full-time at 26-22.

Well done to Melbourne Rebels on a fine display where they took advantage of a number of lost penalties by Moana in the first half. Credit to James Hanson, who was the mastermind at starting hooker when it comes to the line-outs & maul, with back-to-back tries before an early mark to the bench not long after half-time. Meanwhile, Reece Hodge managed to put the Rebels back in the box seat & stayed there thanks to his stunning 2nd half spell. He too not only scored one by himself but also assisted one that ended Andrew Kellaway’s seven-game hoodoo without a TRY on the right-wing.

And unlucky from Moana Pasifika tonight, who played really well against an opponent that doesn’t give away any team lightly. They fired off well with the early lead which is good signs from this new Pasifika Super Rugby outfit. Although they kept going despite losing the lead, and were almost within winning reach again towards an upset. Unfortunately, a number of lost penalties counted against them in the 1st half came back to bite them later on before Moana fell just short.

Moana will return to Mt Smart Stadium in Auckland for Round 12 next Saturday afternoon v NSW Waratahs, who were triumphant in their 24-21 upset win earlier tonight v Crusaders. And the Rebels are also heading off to Auckland as well, but this time at Eden Park on Friday night v the Blues.

0 comment
0 FacebookTwitterPinterestEmail

We have to say that Reece Hodge is everything that the Rebels needed tonight at full-back. His kicking was top-notch as always when it comes to conversion kicks into goal and even the 50/22 rule into touch. He also played a brilliant role in the attack during the 2nd half, not only Hodge’s a huge threat going forward through the channels but he knows where to find his men or the TRY line himself. Well done on a fine performance with the help of his forwards that helped the Rebels regain the lead, as well as their winning margin.

Meanwhile, credit to James Hanson with his first-half display having scored two tries for the Rebels tonight. He credits these winning penalties off the back of the Moana Pasifika’s disciplinary errors, especially at line-outs/throw-ins where Hanson knew what to do with the ball before it was well executed with plenty of support past the TRY line. And although he finished his shift early, he has so much experience on his plate when Hanson is an important player to learn from within the Rebels dressing room.

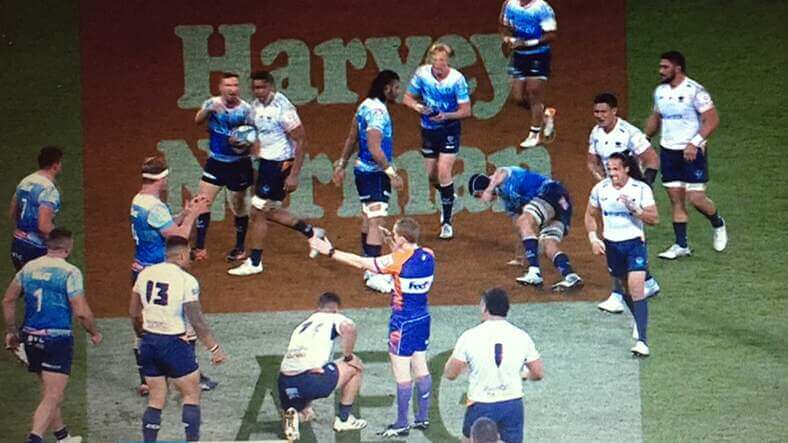
And Levi Aumua put in a great shift in the No.13 shirt at outside centre for Moana Pasifika tonight. He isn’t shy when Aumua smashes through the Rebels defense while building some pressure with the ball going forward. His full-game contribution alongside the benefit of winning penalties, helped Moana find their way past the TRY line on a couple of occasions. It just wasn’t his night to reflect when Moana’s disciplinary issues led to plenty of lost penalties before they left it too late towards full-time.

0 comment
0 FacebookTwitterPinterestEmail

It was a huge scoring game last night when the Melbourne Rebels began to bounce back from 3-17 after half-time with two tries from Cabous Eloff & Richard Hardwick, but it’s the Brumbies who were firing in all cylinders throughout the full 80 in a 17-36 win at AAMI Park.

The Rebels were happy to welcome back a few key players into the fold, such as two backline players in Andrew Kellaway & Reece Hodge, plus loose forward from the bench in Richard Hardwick. These players have played a part in their comeback after half-time alone, which wowed the home supporters off from their seats every time the Rebels score. If they’ve done this from the start, then the Rebels would’ve still been in the running but they have left it too late following a poor first-half spell.

Meanwhile, how good is this Brumbies attack! It’s incredible to look back with a whopping six tries on the board, mainly from full-back Tom Banks, who led this charge. We also saw some outstanding finishing from Tom Wright with two tries himself on the wide right, and the same goes with their back-row forwards in Rob Valetini & Jahrome Brown at the blindside (No.6) & openside (No.7) respectively. It’s only week 4 of 18 so far, but we’ll see if this Brums attacking shape will put to the test against the five New Zealand sides later on.

The Brumbies will return home in Canberra next Friday at GIO Stadium in a Grand Final Super Rugby AU rematch v Queensland Reds. And Melbourne Rebels are still looking for their first win of 2022 when they travel to Sydney next Saturday night v Waratahs at the SCG.

0 comment
0 FacebookTwitterPinterestEmail

It’s been a long time coming after 287 days, as Melbourne Rebels get to play at home in Round 2 of the Super Rugby Pacific v Western Force at AAMI Park. The first 20 minutes may be quiet for both teams, with the Force up ahead early in the first half, while Rebels just took the one three-point goal. But it’s the away team (Western Force) who found it too easy to nail down v Rebels by 25 points, 3-28.

The Force looked stronger than ever off the back of their 2021 season, even though they were so close to upsetting the Brumbies with the narrow loss last week in Canberra. They showed patience and teamwork for the majority tonight that led to a couple of successful big points, having dug deeper after the first 20 minutes of play when the Rebels lacked their attacking fire & possessed messy discipline. That’s how the Force took control of this game with Tim Anstee onboard with the first-half TRY. And they continued to increase their winning margin after half-time through Kyle Godwin via the penalty scrum feed, where the Force wrapped this up comfortably through another five-pointer touch score by sub utility back, Byron Ralston.

Meanwhile, the Rebels always know how to get the ball rolling defensively. They won a few penalties along the way including the three-point goal between the sticks from Matt Toomua at fly-half. However, they made plenty of ill-disciplinary mistakes, mainly full-back Reece Hodge, who received a double yellow card that turned into red. And the Rebels were also disorganized when trying to get the job done with the ball on hand despite the winning penalties, which is disappointing to reflect through a 25-point loss after full-time.

Rebels will now head off to Suncorp Stadium in Brisbane, QLD on Friday night v Fijian Drua where they both seek their first victories of 2022. And the Force will host their first home game this year at HBF Park in Perth, also on a Friday night local time v Queensland Reds, which is straight after the conclusion of Drua v Rebels match-up.

0 comment
0 FacebookTwitterPinterestEmail

Alex Mafi was outstanding as the starting hooker for the Reds. He has the physical build to set up throw-ins and driving maul.

That first good example was not long after half-time. When Mafi controlled the maul by staying square & forward. He can notice the Rebels struggling to hold on.

Despite their desperate defense needed to hold the Reds out. But Mafi is focusing on the support needed to find some space. Thanks to the push from his team-mates. And pulled the trigger at the right time. When Mafi able to find the execution that marked the Reds first touchdown.

Then again in the 77th minute when the Reds earned another reprieve. As the Rebels began to falter. In return Mafi got the same routine right. Knowing where the Rebels struggle. Before the opposition just too slow to catch him. With Mafi using his attacking prowess of power & pace. And secured another touchdown that eventually became a winning moment.

It goes to show that Brad Thorn trusts Mafi in the starting XV. Where he disposed Brandon Paenga-Amosa. He has the defensive attributes to help out & build blocks. And the same goes in the attack with the physical package to hurt the defenders. As long he knows where the opposition unable to reach him. Mafi hopes he can help go one better in 2021.

Suliasi Vunivalu

Glad to see him return to rugby union after all with the Reds. Where he came off a great 2020 in rugby league for the Melbourne Storm. He may not been starting for most of the time tonight.

But as soon as he got off the bench in the 64th minute. Vunivalu added a different dimension in the backs. Mainly on the right flank alongside Filipo Daugunu via the opposite dial. While Jordan Petaia moved to inside centre. After a great run before Vunivalu came on. Just not enough support to support his execution early.

With Vunivalu you see him reliving Petaia to his favoured position. While he runs and runs around. Especially when he almost scored a touchdown off the boot of Joe Powell. The ball may have gone into touch one meter past the TRY line. But it still gave the Reds more chances in return.

Where the attacking awareness injected on the field. Despite the 14 men created by the Feao Fotuaika dangerous tackle earlier on. And the ill-discipline. The Reds were relieved to have his support. With the end goal all about winning. And they were able to just meet that requirement.

If Vunivalu did not come on then the Reds may not have won without him. He deserves to start next game. Not next week since his team has the bye. But he already shown lots of finishing prowess in league. There is lots of touchdowns recorded last year. Might be a different code this time. But he can transfer this attribute. So his presence is exactly what Brad Thorn needs in this squad. And go one better in 2021 for the championship.

Reece Hodge

He would be one of the best players on the opposite end tonight. Even though he is in a losing side. After starting the lead for most of the time & holding it. But just unable to maintain it until the very end.

Reece has the ability to run up to the defenders. Where he can provide the headstart needed for the Rebels. Thanks to the Reds ill-discipline. Credit is due to give himself a chance from the forwards unit. Goes to show these foundations.

It gives credit for the Rebels knowing where the Reds struggled. And why the home side unable to stay ahead for the majority. With Hodge using the pace & physicality not just the usual attack. In a bid to try and fend the opposition team.

He can hold back and stuff the Reds attacking half. When they lack support to continue with the ball. Hodge able to find and hold them short. Good reading there when the Reds felt isolated at times. And you have a tall stature in Reece holding them back. Reece can also kick into goal as well even from long range. Another reason there to face such a tough player.

The discipline mistakes late from the Rebels cost this game. Where there was not much opportunity to support Reece crack up the defense. Instead it is just desperately holding off with a lot of defensive input. And so little in the attack to distance themselves even further from the Reds. That is the one area the Rebels need to focus on next game. May be the answer to see more of Hodge being an all round player in the attack. Where he can finish off both the speed and boot. Marry it up and you see it as the game changer.

0 comment
0 FacebookTwitterPinterestEmail