Tag:

Rugby Australia

By Daniel Cullinane

Twitter: @dcullinane02

It was a feisty build-up to this second test between New Zealand and Australia at Eden Park. All the talk had been about the controversial decision for time-wasting that ended the Wallabies chances of winning the Bledisloe cup in the first test. The reckless action of lock Darcy Swain, and the claims that the Wallabies had disrespected the haka. The potential for a heated contest was high.

Australia got the game under way and quickly put pressure on New Zealand with a break by Jed Holloway, who charged into the All Blacks 22. He quickly undid his good work by dumping Dalton Papali’i at the ruck. He was yellow-carded, and so began the rollercoaster of indiscipline that appears to be blighting the Australian game.

New Zealand on the other hand, were lifting their game and showing early dominance. A strong scrum saw All Black number 8 Ardie Savea break. The ball went wide to Beauden Barrett, who turned on the after burners and then chipped, to pile the pressure on the Wallabies. The All Blacks were awarded a 5 metre scrum but Savea was unable to control the ball at the base. Australia cleared their lines.

Then a moment of magic from Wallaby wing, Marika Koroibete. A break down the midfield followed by a chip, catch, and grubber to put huge pressure on the New Zealanders in their own 22. Again, the Wallabies infringed, leading to a kickable penalty for Richie Mo’unga. 3-0 to the All Blacks. Wing; Will Jordan soon built on the score with a fine break and subsequent try. Mo’unga made it 10-0.

Australia was creaking badly and the pressure was clearly affecting their thinking. Tom Wright confirmed this by taking a quick tap penalty from an eminently kickable position and an almost guaranteed 3 points. Another penalty by Wallaby skipper James Slipper led to a New Zealand lineout in the Aussie 22. Afterwards, a powerful maul forced a penalty try and yet another yellow card for Australia. David Porecki left the field for 10 minutes. Half time arrived and the score was 17-0; New Zealand were flying.

In the second half, the All Blacks carried on where they had left off. Within 2 minutes, they scored through captain Sam Whitelock. Mo’unga converted to make the score 24-0. The All Blacks had by now recognised that the Wallabies couldn’t live with them in the set piece. Again, they went to the lineout. Again they formed a driving maul and powered over the Aussie line. This time it was Codie Taylor on the scoresheet. The conversion was missed. 32-0 to the All Blacks.

At last the Australians fired a shot when Nick Frost charged down a New Zealand kick in their 22. Pete Samu collected the ball and surged forwards. Support came from replacement hooker Folau Fainga’a, who charged over the line. Bernard Foley kicked the conversion; Points on the boards. 32-7.

The All Blacks responded almost immediately with another pushover try from the lineout. Samisoni Taukei’aho the scorer.

In the 76th minute, Richie Mo’unga had another shot at goal to make it 40-7. The Aussies would have the final word in a very one-sided game when a determined Jordan Petaia forced his way over. The try was converted. The final score 40-14 to New Zealand. It was a dominant display from the men in black. Probably their best performance in the tournament.

The All Blacks were sharp, their set piece was outstanding, and they were clinical when they needed to be. Australia has some big issues to deal with. Their discipline has been woeful since their test series defeat to England back in July. They have spent large parts of the Rugby Championship playing with less than fifteen men on the field. Going forward, the lack of leadership is clearly a problem they must address if they are to be successful.

0 comment
0 FacebookTwitterPinterestEmail

By Daniel Cullinane

Twitter: @dcullinane02

Even after the defeat by the Springboks in the last round of the Rugby Championship, the Wallabies would go into this match with quiet confidence. With home advantage against an All Blacks team who have looked shaky in this competition and beyond, they would have felt that they could get on top of their old rivals.

New Zealand would be in a better place after a resounding win against the Pumas, but there is still a sense that they are unsure of themselves. The Wallabies would seek to test the All Blacks alleged fragile state. The Wallabies set the tone for the game by advancing on the All Blacks during the Haka, signalling that they were really up for this one. However, as the game got under way it was the New Zealanders who took the initiative.

After just 3 minutes, All Blacks hooker Samisoni Taukei’aho powered over the Wallabies try line to open the scoring. Following a successful conversion from fly half Richie Mo’unga the score was 0-7. The men in blacks dominance continued and was rewarded with another 3 points from the boot of Mo’unga. They were building nicely. The Wallabies were yet to turn up.

After 17 minutes, some good work by the Australians from a lineout lead to a kickable penalty. Veteran Aussie fly half, Bernard Foley who was exemplary all evening opened his account with three points. Some slick handling saw Wallaby full back Andrew Kellaway score in the corner. But on closer inspection it was clear that he had been unable to ground the ball.

The Australian team were growing in confidence and starting to impose themselves on the All Blacks. They kicked to the corner after being awarded a penalty at the scrum. There was a short drive from the ensuing lineout and then a pick and go to score by Aussie No8 Rob Valetini. Foley made it 10-10.

With an All Black going to the bin, the momentum was firmly with the Australians. Marika Koroibete charged up the field and smashed into New Zealand wing Caleb Clarke. The Wallaby forwards then dismantled the All Blacks at the resulting scrum. Although the scoreboard didn’t reflect it, Australia were on top. But then, everything changed. The Aussies hit self destruct. A superb and powerful break by Clarke ended with a pile-up near the Australian try line. Indiscipline meant that Tom Wright and Darcy Swain were sent to the bin. The tables turned almost instantly, with the All Blacks being held up over the line. Half time came, the score 10 all.

The men in Black had clearly been told to take advantage of the 13-man Australia, and did so in spectacular fashion. A testing kick in behind and then some rapid passing saw Samisoni Taukei’aho score his second try of the match. Soon the Wallabies were back to a full compliment and picked up another kickable penalty. Foley rarely misses, making the score 13-17.

More indiscipline led to Wallaby scrum half Jake Gordon going to the bin. New Zealand soon took advantage with Richie Mo’unga dissecting the Aussie backline to touch down near the posts. He converted his own try, making the score 13-24 to New Zealand.

Beauden Barrett then reminded everyone what a world-class player he is with a superbly weighted chip over the gold defence that was collected by wing Will Jordan, who raced away to score. The All Blacks were in cruise control. Australia then fired a shot of their own down the other end with Andrew Kellaway running on to a flat pass from Foley to grab a much needed score. Foley converted. Minutes later, Kellaway was at it again. Some long passes stretch the New Zealand defence allowing the full-back to score in the corner. 27-31 to Australia.

New Zealand then extended their lead through a Mo’unga penalty, but Australia weren’t finished yet. A brilliant one-two between Koroibete and Pete Samu saw the back row forward score. Foley then drew the teams level at 34 all. A remarkable comeback by Australia.

When Australia were awarded a penalty in front of the posts, the replacement scrum-half Nic White stepped up and kicked the points for Australia to take them into the lead. As expected, the All Blacks fought back but then gave away a penalty 2 metres from the Aussie try line. Then a moment of controversy saw referee Mathieu Raynal award a scrum to New Zealand for Bernhard Foley allegedly time wasting.

The All Blacks saw their chance. They won the ball, and then moved it wide, allowing Jordie Barrett to score in the corner in the 80th minute. The kick was missed, but it didn’t matter. The men in black had done enough to win the match and retain the Bledisloe cup. Australia will say they were on the wrong end of a refereeing decision, and that cost them the game. Their discipline needs to be fixed before the return fixture. Final score 37-39. Great game.

0 comment
0 FacebookTwitterPinterestEmail

By Daniel Cullinane

Twitter: @dcullinane02

After an impressive performance against the South Africans in the first test, the Australians will have been confident going into the second match. The final score didn’t reflect the dominance of the Wallabies. The Springboks are all about getting the ‘W’. Their brand of rugby isn’t pretty, but it is physical and highly effective. Last week’s result will have hurt.

The game kicked off in a rainy Sydney at the Allianz Stadium. Right from the start, the Wallabies were looking to take the pace from the first test into this game. The South Africans looked sharp and were bringing their expected physicality. The Australians were struggling to handle the Bok’s powerful drives into their defensive line. This culminated in Damian De Allende crashing over the Aussie line in the eighth minute. The try was converted making it 0-7 to the Boks.

To add to the Wallabies’ pain, Matt Philip went to the bin for infringing in the build-up to the try. After a quiet game in Adelaide last week, South African captain Siya Kolisi, was putting in a much-improved performance. His steal at the breakdown stopped the Wallabies deep in the Boks half. Nic White was doing his best to get the ball away from the ruck with speed and was getting plenty of attention from the Boks and their fans. Possibly for his Oscar-winning performance in the previous test.

The Boks continued to go through their bullying tactics upfront but were creating little in the backs. They continually tested Reece Hodge in the first half under the high ball, but he dealt with everything that came his way. The Australians were building nicely in the Boks half and putting pressure on the South African’s defence. This eventually led to a penalty and three easy points for Wallaby fly half, Noah Lolesio.

As halftime approached the Australians would have been pleased with the 3-7 scoreline. The Boks had produced little in the way of creativity and were still there for the taking. Then, from a South African box kick, a moment of brilliance from their debut wing, Canan Moodie. He leapt high above Aussie wing Marika Koroibete, and raced away with the ball to score his first try for the Springboks. The half ended 3-12 to the South Africans.

After the break, both teams appeared nervy, and a kicking battle ensued. Two minutes into the half, and the Boks were starting to string together some passes leading to a try for lock Franco Mostert. A missed conversion by Boks fly-half Damian Williamse made the score 3-17.

The South Africans were taking control of the game. The Australians were desperate to get hold of the ball and keep it. Nic White made a timely intervention to intercept a pass to Mpimpi on the wing. Australia went on the attack and made their way up the field. They put the Boks under huge pressure forcing them to persistently infringe, however no cards were shown to any of the South African team. The Australians kicked to touch, but then let the Boks off by committing a penalty and allowing them to clear their lines.

It was clear to see that the Wallabies were starting to lose their shape and the Springboks were in full control. Wave after wave of Springbok attack lead to Damian De Allende being driven over the Australian line, but he was held up. Shortly after, a sweeping move by the South Africans saw Makazole Mapimpi score in the corner.

His celebration was not welcomed by Koroibete and sparked a huge brawl. Mapimpi was yellow carded, but expect more sanctions when the citing officer has reviewed the incident. A final flourish from the Wallabies saw Pete Samu score leaving the end result, 8-24. The Springboks were deserved winners of a niggly contest, and Siya Kolisi was immense.

0 comment
0 FacebookTwitterPinterestEmail

Coming into the game, both sides were coming off a loss and desperately needed a win to keep their title hopes alive. Australia started quickly with Fraser McReight scoring in the opening minute, conversion slotted by Noah Lolesio.

Lolesio then kicked a penalty just a few minutes later to put the hosts 10-0 into the lead. In the 23rd minute, Handré Pollard kicked a penalty of his own to bring South Africa within 7 points.

In the 30th minute, South Africa looked dangerous attacking the Australian line as Ox Nché barrelled his way over from a short distance just to be held over the line by the Aussie defence.

Just before the half-time whistle blew, Springbok scrum-half Faf De Klerk was controversially yellow carded for striking fellow scrum-half Nic White in the head which reduced the away side to 14 men.

Australia started the second half strong as outside centre Len Ikitau made a darting run into the South African 22 before the ball was spun wide to Marika Koroibete who finishes the beautifully worked try.

In the 56th minute, Australia once again scored following a beautiful break from fly-half Noah Lolesio who popped it on to Fraser McReight who scored his second of the game.

The try was converted once more by Lolesio before slotting a penalty also to take the hosts 25-3 into the lead as we entered the final quarter of the match.

It took the Springboks 74 minutes to score their first try of the match as substitute Kwagga Smith ran one in for the visitors.

Aussie number 8 Rob Valetini was yellow carded in the final minute of the match which led to Kwagga Smith scoring his second try of the match, however, it was too little too late for the visitors who lost the match 25-17.

0 comment
1 FacebookTwitterPinterestEmail

What a performance it has been to kickstart this year’s Rugby Championship campaign in none other than Folau Faingaa, who started and played most of this opening match in the Wallabies No.2 shirt at hooker. He provides excellent throw-in accuracy as always at line-outs before Faingaa hides the ball while pushing the maul square that helped the Wallabies nail down a few tries on the board. It’s one of their main scoring sources, especially when they began to catch up to the Pumas when not only the Wallabies scored the penalty TRY in the 2nd half, but also extended their lead when Faingaa scored a TRY himself not long before he earned a well earned rest with eight minutes left. He hopes to keep up the good work and put another full game performance next Sunday AM Australian time v Pumas in San Juan.

Next up is Hunter Paisami on the Wallabies Inside Centre at No.12 where he never stopped running and working hard all game v Los Pumas. His passes was outstanding when looking out for numbers within the backline that helped plant foundations for the Wallabies to get the job done. We saw him pass to Quade Cooper before Cooper helped Jordan Petaia open the Wallabies TRY scoring account through a bit of space in the first half; He did the same thing to Len Ikitau via the quick offload where Ikitau finished this match on a high note. Not only he can be a excellent provider, but he can also use his physicality and pace to track back and make up bumps that reflects his all-round output in the midfield. Well done.

And Emiliano Boffelli made up most of the Pumas scoring tally on the wide left at No.11. His tall build has provided excellent cover with pace in the Pumas attack, so he can shield the Wallabies defense before opening a bit of space for his men to get the job done through the gate. Plus, his kicking accuracy through the goal posts is unbelievable in any angle with the help of a few winning penalties and these two converted tries. Unfortunately, the Pumas just couldn’t get over the line when a few lost penalties via ill-discipline saw them regress before it’s too late.

0 comment
0 FacebookTwitterPinterestEmail

The 2022 Rugby Championship season is back with the Wallabies beginning their two week tour v Los Pumas in Argentina; first stop: Mendoza where the action took place earlier this morning Australian time at Malvinas Argentinas Stadium. The Pumas were off the mark early in the first half at 19-10 while the Wallabies began to make up lost time from behind. Although the Pumas extended their lead a bit further, but they couldn’t stay ahead on the run home when the Wallabies took advantage of their lost penalties via the ill-discipline before the away team was too good in the end, 26-41.

What a start to the 2022 Rugby Championship campaign by the Wallabies with the win in Mendoza. They may need to work on their fire offs when the Wallabies fell behind earlier in the first half, which is something they need to rectify ahead of their upcoming meetings v Springboks & All Blacks in a few weeks time. But they eventually got the ball rolling and began to make up lost time when Jordan Petaia scored their opening TRY before the Wallabies upped the ante in the 2nd half with a few tries on the board.

Not only they were able to close in on the Pumas, but took advantage of their opponent’s regressed momentum with the ill-discipline & never looked back after they took over the lead with the win. It’s good to see them top the ladder charts right now with a bonus point but there’s still more work to do if the Wallabies can go all the way with five games left.

It wasn’t the afternoon the Los Pumas wanted to see out at their home turf with a hefty loss v Wallabies. Their first half run was not bad when the Pumas got ahead early when Pablo Matera opened the account before they took home a series of three-point penalty goals. They continued to extend their lead a bit further in the 2nd half when the Pumas followed up with another big score by Juan Manuel Gonzalez. Unfortunately, the Pumas lost all progress when ill-discipline began to catch up against them, especially when Matias Alemanno had to sit ten minutes in the naughty chair following a Wallabies penalty TRY. And it’s the one huge weakness that held the Pumas hostage before it’s too late when it was just too difficult to rebound towards full-time.

The second & final stop in this year’s Wallabies tour of Los Pumas continues next Sunday 5 AM AEST at the Estadio San Juan del Bicentario.

0 comment
0 FacebookTwitterPinterestEmail

The Norths are celebrating with full-back Max Burey in the dressing room right now after he delivered the game-winning drop goal that saw his side lift the Minor Premiership. He may not have the tall reach but has lots of physicality where he shares a similar build with current Waratah Will Harrison. His pace created nightmares for the Easts when running through their territory while possessing excellent kicking power; mainly when clearing out of trouble but he too can find both the touch line & goal posts as well, like he did within a few mins to go in the 2nd half. He hopes that his World Sevens tour with Australia earlier this year plus his past Rugby League expertise will help the Norths go all the way in the Finals beginning next Saturday v Manly Marlins.

The next Norths stand out player belongs to James Turner on the right wing backline at No.14. He‘s so quick through the channels when supporting the attack & is an amazing finisher as well, especially when Brad Hemopo assisted him via a quick offload & Turner pulled comfortably like a Track & Field sprinter with the Norths opening TRY on the far right short side. His tall reach & teamwork got the best of him defensively via an excellent read before locking the Easts up that helped his Norths side win scrums/penalties/turnovers. James has unfinished business at age 23 where a good Shute Shield finals performance, as well as potentially delivering his side a title, would hopefully see him back in the Waratahs picture next season at Super Rugby level.

And Jack Bowen made an instant impact off the bench for Easts when they were nine points down at one point in the 2nd half. His partnership with half-back Teddy Wilson was behind one of their team’s turning points that got them back into contention, especially when he added the extra conversion points. He & Teddy would be perfect in cricket as if they both took over the top-order batting collapse & form a big stand at the same North Sydney Oval. It boosted some confidence when Easts scored two more tries before they led for the first time with 15 mins to go. Sadly, Easts just couldn’t hold off until the very end when slow starts through both halves came back to bite them, and it would’ve been different if he played the full 80.

0 comment
0 FacebookTwitterPinterestEmail

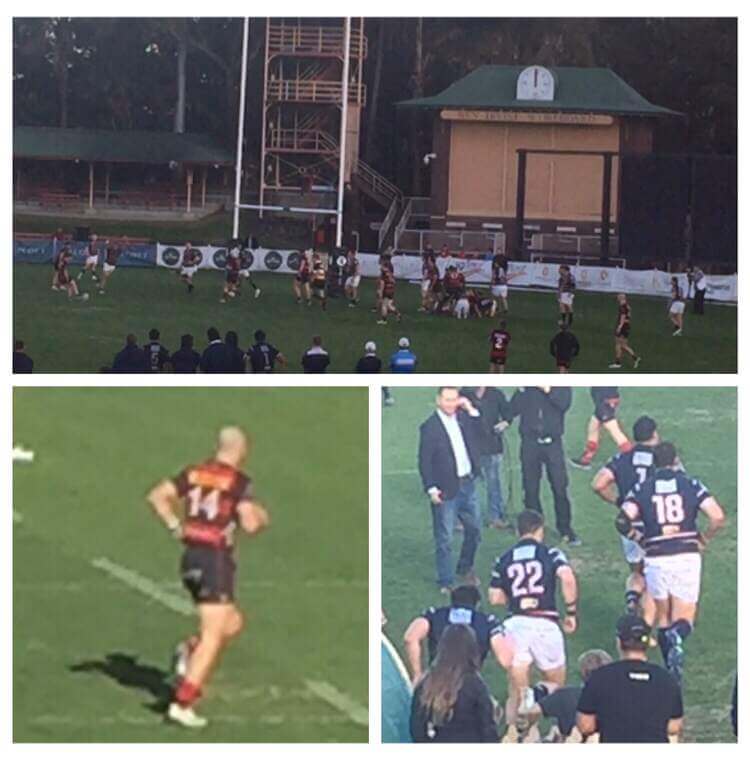
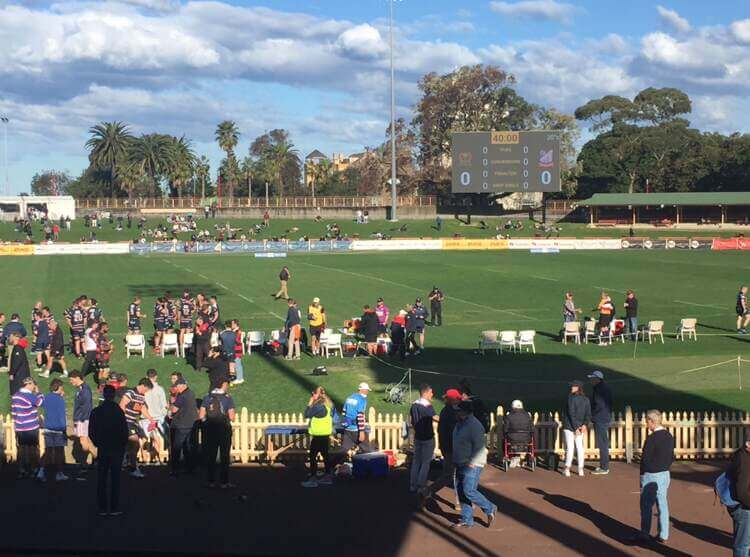
It was great to be on the ground at North Sydney Oval earlier this afternoon to watch the regular season Shute Shield finale between Northern Suburbs v Eastern Suburbs.

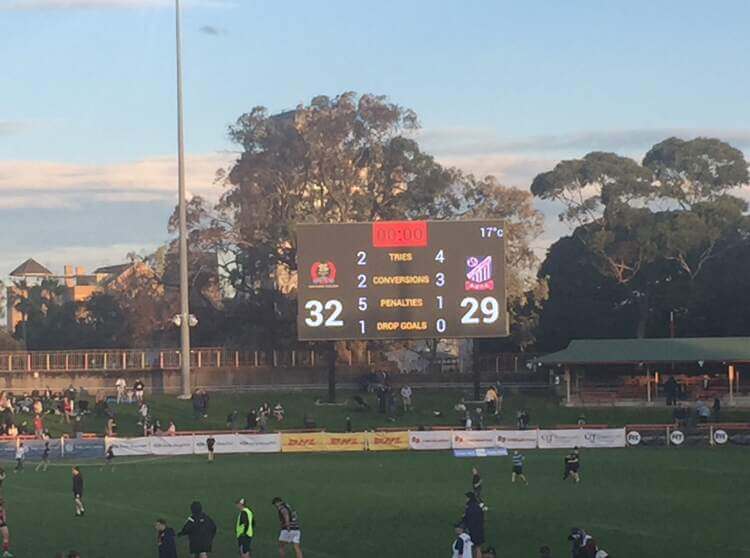
Both sides played very well for the whole time that went down the wire, especially when Easts went from nine points down earlier at 26-15 in the 2nd half to first time leaders 26-29 with a only 15 minutes to go. But they just couldn’t overcome the minor premiers of 2022 in Norths, who not fired off in the first half but also built a good lead later on, before they responded to the Easts’ 2nd half resurgence with a Max Burey drop goal that marked the winning move towards full-time. 

The final score was Norths 32-29 Easts as we look forward to the four-week Finals Series beginning with the Qualifying Final in Round 1 next Saturday.

Commiserations to Easts with the narrow loss there. They have came from a long way when Easts made up some lost time that helped them close into Norths by a four-point gap (19-15) at the break. Now they may not have got the ball rolling straight away when Easts also suffered another setback after Norths extended their lead; However, a few changes of the bench benefitted another two tries in the 2nd half where they finally got ahead for the first time. They just couldn’t hold them off with a very small lead under pressure unfortunately, when the slow starts and incomplete attacking conversions eventually came back to haunt Easts.

Meanwhile, congratulations to Norths with the 2022 minor premiership title. It’s good to see them build some early momentum through both halves before there was a few ill-discipline errors where Easts fought back with a few tries/three-point goals of their own. However, they never gave up when Norths won plenty of ball opportunities thanks to them shutting down the Easts attack defensively. They had plenty of time to prevent Easts from slipping past them in their tracks. And to level the scoreboard at 29-29 with six minutes to go before they regained the lead with two minutes to spare via the drop goal & hold Easts off towards full-time is just incredible rugby to watch from a top notch Shute Shield side like Norths.

The Qualifying Finals are all set for next Saturday; Norths v Manly, Sydney University v Randwick, Eastwood v Eastern Suburbs & Warringah v Gordon.

For now, I had a wonderful Saturday arvo at a legendary sports ground that is both suitable for rugby union and cricket in North Sydney. I even saw a Greg Chappell Cricket Centre shop when I walked just outside the venue. I hope to visit there again next time as we turn our attention now to Game 1 of the Rugby Championship tomorrow morning at 5 am AEST when the Wallabies take on Los Pumas in Argentina.

0 comment
0 FacebookTwitterPinterestEmail

Nick Chan has to be the first in-line when it comes to the Top 3 performers after a outstanding 2nd-half spell this afternoon at Inside centre for Randwick. He was so destructive in setting up their attacking execution twice that changed everything against Eastwood. We saw him process the mini cross-kick for his midfield partner Dan O’Brien to finish off inside the TRY box before a quick offload later on through the channels where no one couldn’t stop James Hendren on the far-left short side. That way, he has a lot to offer when being tested in both attack and defense that would hopefully earn him a future Waratahs call-up at Super Rugby level, such as unpacking with his immense pace & physicality.

Next up is Matt Faessler who was also another Randwick standout player at starting hooker. He demonstrated a masterclass from line-out time & pushed his way with the ball down low through the driving maul that help respond to Eastwood’s three-point early lead. He can also be an excellent communicator when backing Randwick up with numbers where Faessler scored another TRY later in the 2nd half, as his side began to stay further ahead & never looked back for the rest of this match. It’s great to see him gain some Super Rugby experience from the Queensland Reds earlier this season and come back to Club Rugby better with the Galloping Greens, after he was recently on the Australia A tour in Fiji.

And Michael Icely rounds out the Top 3 for Eastwood in the Number 8 role. He’s got an incredible tall stature that struck a nice balance with the physicality where his side benefitted Randwick’s slow start earlier on. It reflected his all-round ability alongside some teamwork when he helped them win turnovers/penalties defensively, as well as being a major force going forward with the scrum feed, ruck & maul. His personal best performances are there when Icely scored the consolation & final TRY of the afternoon. Sadly, Randwick’s messy attacking play ruined their good start before it isolated the defense – where they began to fall behind not long after half-time before it’s too late.

0 comment
0 FacebookTwitterPinterestEmail

It’s been a close first half between Randwick and Eastwood here at Coogee Oval. Randwick got the first TRY after Eastwood opened the scoreboard with the three-point penalty goal before Eastwood lead at half-time, 5-10, courtesy of a number of successful shoves that lead to a incredible TRY from Fabian Goodall on the inside centre at No.12. In the end though, it was Randwick who secured an easy win after a series of successive big scores in the 2nd half, 31-17.

It’s good to see Randwick respond to Eastwood’s opening three-point penalty goal with a complete line-up masterclass from Matt Faesseler at hooker. Although they’re not bad defensively when they won a few penalties/turnovers, but needs to be a bit more patient going forward where a few forward passes slowed down their progress. Fortunately, they addressed that problem after half-time where a series of tries from Randwick changed everything on the up with an easy win going towards full-time. Credit to Nick Chan for proving the finishing touches twice to Dan O’Brien & James Hendren, while Faesseler scored another TRY before James Tomkinson topped the cherry on the cake when he touched down on the TRY zone.

Meanwhile, Eastwood benefitted from Randwick’s early discipline & forward passing errors that helped them get the ball rolling. They dominated the ball going forward for the majority thanks to Fabian Goodall, but needs to be wary when trying to prevent Randwick from scoring at their own end. Yes, they may have scored the consolation TRY from their own Number 8 in Michael Icely alongside a few fresh faces off the bench; Sadly, Eastwood just couldn’t stay ahead when their first-half lead was slammed downhill into the ground. A messy attacking shape through open play didn’t match the standard Randwick fought back in the 2nd half before it’s too late, when their defensive contribution became a whole lot difficult to shut the opposition down.

17 weeks done, one to go in the 2022 Shute Shield regular season before four weeks of finals time. Randwick was 6th & Eastwood was 4th on the ladder prior to this match; Eastwood lost two spots now to 6th behind Randwick as Warringah moves to fourth after a win once again v Southern Districts.

Coincidentally, the Southern Districts will be on the road once again when they will face Randwick, while Eastwood will have an easy chance to close their 2022 regular campaign with a win v the Western Sydney Two Blues in Granville. And 9Gem will continue to show Shute Shield on free-to-air when the Northern Suburbs v Eastern Suburbs at North Sydney Oval next Saturday, 3pm.

0 comment
0 FacebookTwitterPinterestEmail